


Flat-pack cupboard kits can solve a simple storage problem without the price of fully custom joinery. They work best when the wall is straight, measurements are right and the person assembling them has the tools and patience to finish properly.
The box price is only one part of the decision. Fillers, handles, feet, rails, delivery and installation can change the total. Measure first. Then compare the complete job.
Where DIY cupboards from Builders work well
Standard kits suit spare rooms, garages, rentals and straight wall sections where standard widths fit. A free-standing unit is easier than a wall-to-wall built-in because it does not need neat fillers against two uneven walls.
For a tailored result, our DIY cupboards in Cape Town can be planned around your available space. We can help with measured boards, practical layouts and installation where needed.
- A standard kit size fits the opening with enough clearance.
- The floor is reasonably level and the wall is sound.
- You do not need cupboards cut around a sloping ceiling.
- The supplied shelf layout suits what you want to store.
- You have space to unpack and assemble large panels safely.
What to check before buying DIY cupboards
Measure the opening at the top, middle and bottom. Older homes in Observatory, Woodstock and Wynberg do not always have square walls. Use the smallest measurement and allow room for doors to open.
Check skirtings, plug points, curtain rails and cornices. A kit shown against a clear showroom wall may sit forward when a deep skirting runs behind it. That affects stability and the finished look.
Quick measuring check
Mark the proposed cupboard depth on the floor with masking tape. Open the room door and imagine the cupboard doors open too. This quickly shows tight walkways and handle clashes.
How to assemble DIY cupboards safely
Read the full instruction sheet before driving the first screw. Confirm every panel and fitting is present while packaging is still available. A missing hinge discovered halfway through can stop the job.
- Sort the parts. Group sides, shelves, backs, hinges and screws. Keep small fittings in trays.
- Protect the boards. Assemble on cardboard or a clean blanket so melamine faces do not scratch.
- Build the cabinet square. Measure both diagonals before fixing the back. Equal diagonals mean the box is square.
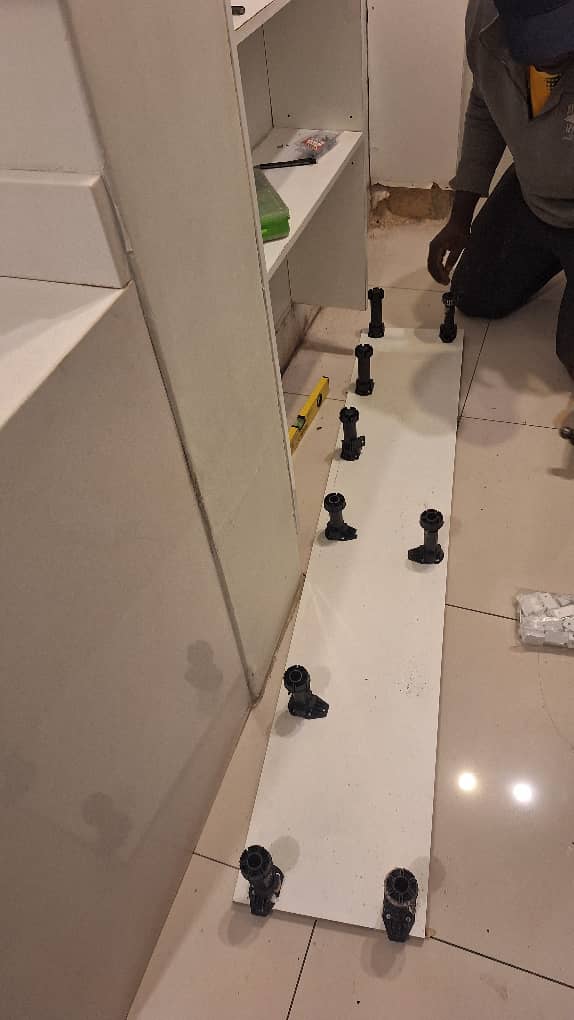
- Stand and level it. Use packers or adjustable feet rather than forcing a twisted cabinet against the wall.
- Anchor it securely. Choose fixings for brick, concrete or drywall. Check for pipes and cables before drilling.
- Fit and adjust doors. Set gaps with hinge screws, working in small turns.
- Join neighbouring units. Clamp faces flush before fixing cabinets together. Add fillers where walls are uneven.
Common problems with DIY cupboards from Builders
Thin backs can let a tall cabinet rack sideways if they are not fixed squarely. Cam fittings can strip when overtightened. Take care with raw chipboard edges because a little water can cause swelling.
Standard doors sometimes leave wide gaps against walls. There may be no neat answer for a ceiling bulkhead, angled corner or deep skirting. A carpenter can make fillers and end panels, but that adds labour and materials.
- Doors rub because the cabinet was assembled out of square.
- Units rock because the floor falls across the wall.
- Shelves sag under books or heavy tools.
- Back panels bow away from the cabinet.
- Wall anchors do not suit the wall material.
- Handles clash with a wall or neighbouring door.
What DIY cupboards may really cost
A basic flat-pack wardrobe can start at a few thousand rand, while larger combinations cost much more. Allow for delivery, handles, extra shelves, wall fixings and tools. Installation may add roughly R1,500 to R5,000 or more depending on size, access and corrections.
Custom cupboards cost more because they are measured for the room and can use the full wall. That extra spend may make sense in a main bedroom where lost gaps reduce storage. In a garage, a simple kit may be adequate.
DIY cupboard quality checklist
- Confirm board thickness and whether edges are sealed.
- Open the hardware pack and check hinge quality.
- Ask whether extra shelves are available later.
- Check the stated load limit for shelves and rails.
- Inspect corners for transport damage before assembly.
- Keep the receipt and photograph product labels.
- Anchor every tall unit, especially in a child’s room.
DIY cupboards versus custom cupboards
Kits win on speed and predictable shelf pricing. Custom work wins when the room has awkward dimensions, when you want a particular melamine colour, or when every centimetre matters. Supawood painted doors and better hardware offer more finish choices.
If existing fronts are sound but dated, read our guide on how to paint cupboard doors. A careful refresh could cost less than removing useful cabinets.
When to call a cupboard installer
Get help if the unit is very tall, must be cut around services, or needs anchoring where hidden pipes are likely. Installation is worthwhile when several units must line up as one run. Small errors multiply across a long wall.
Also consider help if you lack a level, clamps or a drill suited to masonry. Buying tools for one job can cancel part of the saving. An installer can still use your chosen kit while handling the difficult fitting.
If you want help checking measurements, choosing a layout or fitting units, contact CDC Projects for a quote. We will tell you honestly where a kit works and where custom boards make better sense.